Wednesday, November 4, 2015
Focus with Color balance Adjustment
I have shown how you can draw focus to an image with light
This is a similar Photoshop tutorial with Adjustment Layers including a Color Balance Adjustment which allows to also tinker with the Color. It is not difficult to do. Just follow along. It works with most images.
This is the effect I will achieve.
Step 1 : I have opened this free stock image. You will find it here
It belongs to bladekurcze
You can see that it is brilliantly lit. It could so with less light.
Step 2 : Click the Adjustment Layer button in the Layers palette.
Step 3 : Click on Curves from the pop up menu.
Step 4 : The Curves1 Layer forms. You can see the Curves dialogue box on top.
Step 5 : Click the midpoint of the diagonal and drag up diagonally from the middle.
The lights in the image are blown. There is too much light.
Don't worry about it.
Step 6 : Press CTRL+I. The Layer Mask on Curves1 Layer changes to Black.
Step 7 : The image looks as it originally did.
Step 8 : Click the Brush Tool.
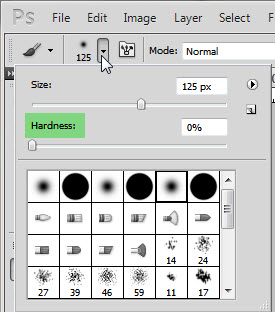
Step 9 : Click in the top panel to open the Brush controls.
Set the Hardness to 0. To increase the Size of the Brush use shortcuts. Press ] (right square bracket) to increase the size and [ (left square bracket) to decrease it. You can also use a shortcut to make the Brush soft or hard. To make a Brush hard press SHIFT+] and to make it soft SHIFT+[.
Step 10 : The Foreground Color should be set to White. To change the Foreground/Background color use the x key on the keyboard. If it is set to some other color press x and then d. It will restore the default.
Step 11 : Lower the Opacity of the Brush to 25% in the top panel.
Step 12 : Make the Brush small by using the [ key.
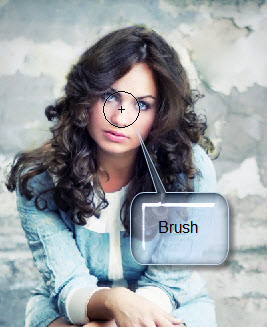
Step 13 : Use the Brush to paint in small increments on the figure.
You can see your brush strokes in the Layer Mask.
Step 14 : Click the Adjustment Layer button and click on Curves.
Step 15 : A Curves2 Layer forms. The Curves dialogue box is on top.
Step 16 : Drag the diagonal downwards diagonally.
Step 17 : Click back on the Curves1 Layer and click on Masks panel at the top. Drag the Feather slider to the right. How much you do is up to you and the light effect you like.
Step 18 : Click on the Curves2 Layer.
The image looks like this. The focus is now more on the girl and not on the background which was very bright earlier.
Step 19 : Click on the Adjustment Layer button and click on Color Balance from the pop up menu.
Step 20 : The Color Balance 1 Layer opens. The Color Balance dialogue box appears on top with the Midtones selected by default.
Step 21 : I have dragged the Cyan slider -35, Magenta -10 and Yellow +25. There is nothing hard and fast about this. It depends on the effect you want.
The image looks like this.
Step 22 : I have next clicked on Highlights. I have set the Cyan slider to +5, Magenta to -5 and Yellow to -10.
Step 23 : I have clicked on Shadows and set the Cyan at -15, Magenta at +5, and Yellow 0. Note again that there is nothing hard and fast about it.
Step 24 : I have decreased the Opacity of the Color Balance Layer to 90%.
This is how the finished image looks.
Other photoshop tutorials are here
Subscribe to:
Post Comments (Atom)


No comments:
Post a Comment