Friday, November 13, 2015
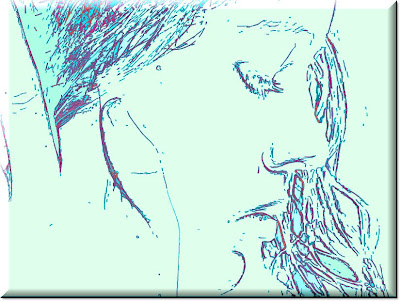
Line Art, Color Sketch in Photoshop CS
Converting a photo to line art is no big deal in Photoshop. It is easily done. What you need is an image, preferably a high resolution one. I will be using a free stock image which you can download here. I will show you to apply a number of filters, including Halftone Pattern and Lighting effects. I will also show you how to make a vignette, besides using Layer Styles.
This is the free stock photo I will be using. It is from http://morguefile.com/
Step 1 : Press Ctrl+J to duplicate the Background Layer. A new Layer 1 forms (red arrow). Click off the eye icon in the Background Layer (green arrow).
Step 2 : Press Ctrl+SHIFT+U to desaturate the image.
Step 3 : Go to Filter>Blur>Smart Blur.
Step 4 : The Smart Blur dialogue opens. I have set the Radius at 40 and Threshold at 25. There is no hard and fast rule for this. You should set it according to your image. Click OK.
This is how my Photo looks like.
Step 5 : Press CTRL+I to invert. This is how my photo looks after inversion.
Step 6 : Go to Filter>Artistic>Poster Edges.
Step 7 : The Poster Edges dialogue box opens filling you screen.
Step 8 : In the controls at the top right I have set the Edge Thickness at 10, Edge Intensity at 1 and Posterization at 6. Again, there is nothing hard and fast about it. You can experiment. Click OK after you're finished.
This is how my photo looks after applying Poster Edges.
Step 9 : Go to Filter>Artistic>Cutout.
Step 10 : In the controls at the right these are the three settings I have given. Click OK.
This is how my image looks. If you want to apply the last filter again press CTRL+F. I have applied it twice.
Step 11 : Click on the Add New Fill/Adjustment layer icon (black arrow). From the popu menu click on Gradient Map.
Step 12 : The Gradient Map opens. Click where the arrow points to open the Gradient Editor.
Step 13 : The Gradient Editor opens. The Presets are at the top.
Step 14 : I am clicking on one of the Presets.
Step 15 : Change the Gradient type to Noise.
Step 16 : Check the Add Transparency box. Then press the Randomize button repeatedly till you are satisfied with the effect. Click OK.
This is how my Photo looks like.
Step 17 : Click where the arrow point to, to bring up the Blend Modes in the Layers pallette and click on Overlay.
This is how my photo looks.
Step 18 : Go to Layer>Flatten image.
All the Layer have been merged into the Background Layer.
Step 19 : Press ALT and double click the Background Layer and it changes to Layer 0. This is to make the layer editable.
Step 20 : Click the Elliptical Marquee Tool.
Step 21 : Press Shift and draw out a perfect and large circle. Place the cursor within the circle and move it so that the eyes, nose and lip fall within the selection.
Step 22 : Click on the Add Layer Mask button and a layer Mask forms next to the layer thumbnail on Layer 0.
This is how the photo looks like.
Step 23 : Go to Filter>Blur>Gaussian Blur.
Step 24 : I have set the Radius at 30 because I am using a high resolution image. Click ok.
Step 25 : Press CTRL and click on the Add New layer icon. A blank layer -- Layer 1 forms -- below Layer 0.
Step 26 : Make sure your Background color is White.
Step 27 : Press CTRL+BACKSPACE. The layer fills with white.
Look in the Layer pallete, Layer 1 has filled with White.
Step 28 : Click back on Layer 0. Click directly on the Layer Mask. Drag the Layer Mask to the trash bin at the right bottom.
Step 29 : This dialogue box opens. Click Apply.
Step 30 : Press CTRL+A. A column of marching ants surround the image.
Step 31 : Click on the Move Tool.
Step 32 : Look in the top panel. Click the 2nd and 5th icons shown by the red arrows.
Step 33 : As soon as you click the circular vignette moves to the exact centre of the White layer.
Step 34 : Click on the Add Layer Style button and from the popup menu click on Drop Shadow.
Step 35 : With the Layer Style open place your cursor on the image and you will be able to move the Drop Shadow anywhere.
Step 36 : In the controls I have dropped the Opacity down to 40 %. Do not click ok.
Step 37 : Click on Bevel and Emboss and Contour.
Step 38 : In the controls I have dragged the Size upto 20. Now click OK.
And this is how my picture looks like.
Step 39 : Click on Layer 1.
Step 40 : Go to Filter>Sketch>Haltone Pattern.
Step 41 : The Halftone Pattern dialogue box opens.
Step 42 : I have given these settings for Size, Contrast and Pattern Type. I have chosen Line as the Pattern Type. There are two other setiings that you can give.
And this
is how the image looks.
Step 43 : Go to Filter>Render> Lighting Effects.
Step 44 : The Lighting Effects dialogue box opens. I am leaving them at the default settings and clicking OK.
And there is my finished image.
Other tutorials are here.
Subscribe to:
Post Comments (Atom)


No comments:
Post a Comment