Thursday, November 12, 2015
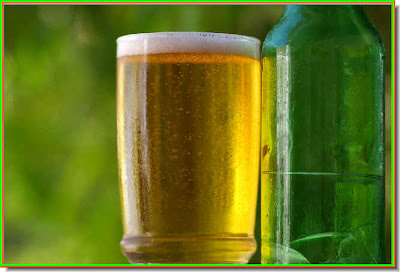
Figure in Glass of Beer
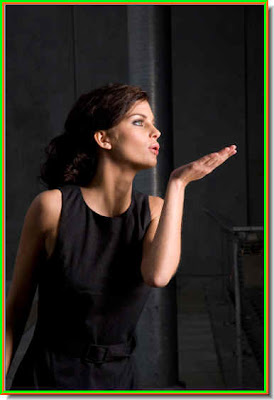

 Step 4 : The girl's photo has been pasted on the glass of beer.
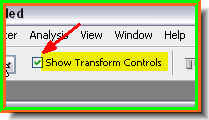 Step 5 : Make sure that Show Transform Controls (Bounding Box in Photoshop 7) is checked in the top panel).
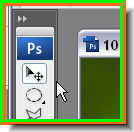
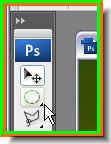
Step 6 : Click the Move Tool.
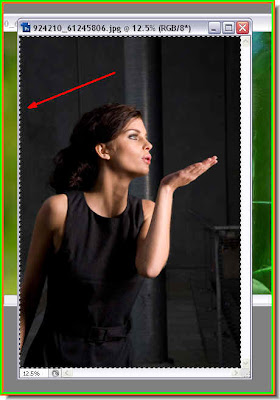
Step 7 : A selection appears around the girl's image. Place the cursor on the top left corner, press ALT and drag down to resize the image proportionately. Then press ENTER to commit the image.
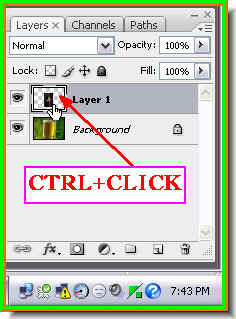 Step 8 : CTRL+CLICK the layer thumbnail on Layer 1.
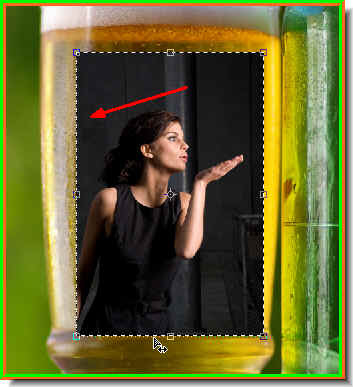 Step 9 : A selection immediately appears around the girl's image.
Step 10 : Now click on Background.

Step 11 : With the selection in place press CTRL+J. This will copy and paste the selection on a new layer i.e. Layer 2.
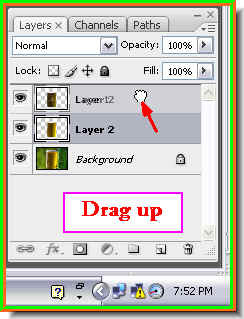 Step 12 : Now drag Layer 2 up with the cursor.
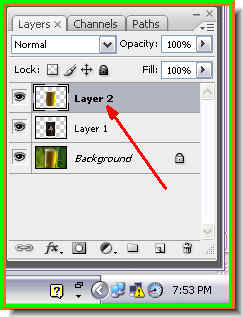 Step 13 : Now Layer 2 is above Layer 1 in the layer's pallette.
Step 14 : Press CTRL+SHIFT+U. This will desaturate the selection and it will appear as shown above.

Step 15 : Now change the Blending Mode of Layer 2 to Hard Light.
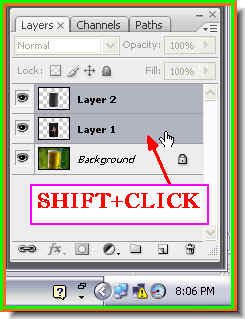 Step 16 : Press SHIFT and click on Layer 1. This will highlight both Layer 1 and Layer 2.
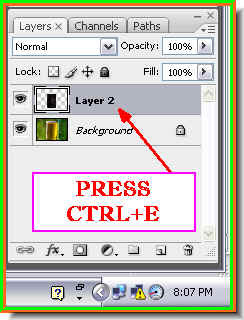
Step 17 : Press CTRL+E. This will compress Layer 1 and Layer 2 into Layer 2.
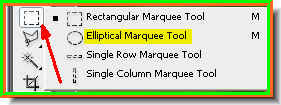 Step 18 : Click the Marquee Tool and select the Elliptical Marquee Tool.
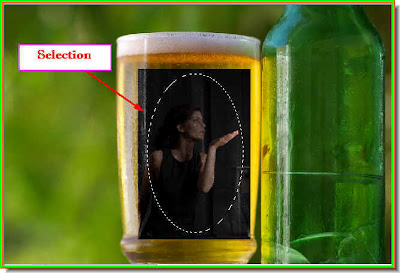 Step 19 : Draw an elliptical marquee with the Marquee Tool.
Step 20 : Click the Add Layer Mask button and a Layer Mask forms next to the Layer thumbnail on Layer 2.

Step 21 : Go to Filter>Blur>Gaussian Blur.

Step 22 : The Gausian Blur dialogue box opens. I have given the Radius at 115.2 pixels because the image I have used is a high resolution one.
 Step 23 : This is how the image looks after clicking ok in the Gaussian Blur dialogue box.
 Step 24 : Notice that the Layer Mask has a border around it which denotes it is selected.
Step 25 : Now click on the Layer thumbnail. The border now appears around it denoting that it is selected.

Step 26 : Press CTRL+L. It will bring up the Levels dialogue box. Drag the White slider at right to end of the histogram as shown. The histogram is the black mountain like graph.

Step 27 : This is how the image looks. It is brighter.
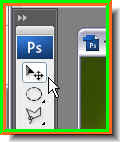 Step 28 : Click the Move Tool.
Step 29 : A selection appears around the image as soon as you click the Move Tool.

Step 30 : Press ALT and drag up with the top left corner handle to resize proportionately. Press ENTER to apply the transformation.
Step 31 : Click the Marquee Tool.

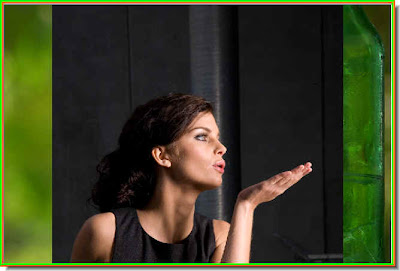
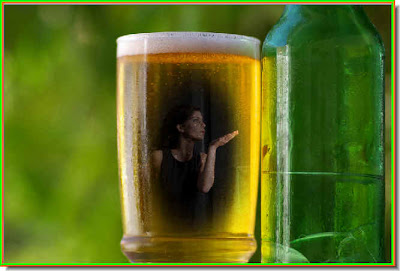
The selection disappears. The image is now complete.
No comments:
Post a Comment