Sunday, November 15, 2015
Photoshop Fun with Gradients
Pradip.Chowdhury
The default Gradients have not changed even in Photoshop CC. They are all there though PS CC is the latest. But then some ideas do not grow old and mature with time and better tools that PS seems to be providing with each new version. Gradients. It can give tints that are always very unusual without too much of effort.

The Gradient tinted flower. The original is below.

I will be using this image. You can download it from here
It belongs to me so you will have no problem in downloading it.

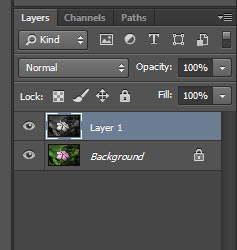
Step 1 : Duplicate the Backround Layer to Layer 1 by pressing CTRL+J.
Step 2 : Press CTRL+SHIFT+I. It will desaturate Layer 1.

Step 3 : Click the Polygon Lasso Tool.

Step 4 : Use the Polygon Lasso to draw a triangle like I have done.

Step 5 : Go to Select>Modify Border>Feather.

Step 6 : Set a Feather Radius of 300 pix for a high resolution photo like this. Otherwise use less feather.
Click OK.

The Feather looks like this.

Step 7 : Click the Layer Mask button. A layer Mask forms on Layer1.

The image looks like this -- half colour, half B&W with no harsh dividing line between the two.

Step 8 : CTRL+CLICK the Layer Mask.

The selection reappears.

Step 9 : Click the Create New Fill or Adjustment Layer button.

Step 10 : From the fly out click on Gradient Map.

Step 11 : Click on the small white arrow to see the default Gradients.

Step 12 : The Default Gradients are visible. Click on Blue, Red, Yellow Gradient. Click OK.

Step 13 : Drop the Opacity to 50%.

The image looks like this. It is half in artificial color and half in its original color. That is about all.
Other Photoshop tutorials are here
Subscribe to:
Post Comments (Atom)
No comments:
Post a Comment