Sunday, November 1, 2015
Twirl Filter
Photoshop has a lot of Filters built into it whichever version you may be using. The majority of the Filters are the same, except for a few between versions. The Twirl Filter can be found in all versions and can used for good effect with say may be a texture.
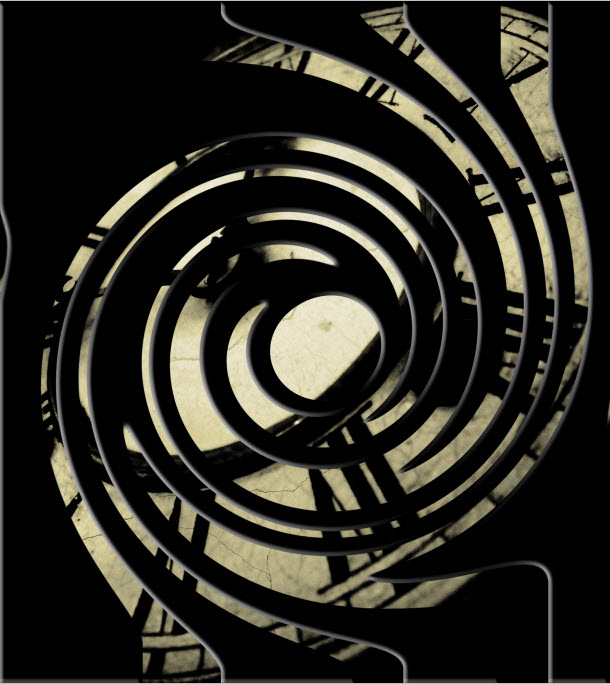
This is the effect you will be able to create with the Twirl Filter and other stuff.
This is the effect you will be able to create with the Twirl Filter and other stuff.
Step 1 : I have opened this free stock image in Photoshop. You will find it here
It belongs to Livi--x
Step 2 : Click the New Layer icon. A new Layer1 forms.
Step 3 : Click the Rectangular Marquee Tool. In the top panel click on Add to Selection.
Step 4 : Draw random selections with the Rectangular Marquee. You don't have to be accurate.
Step 5 : Make sure that the Foreground Color is set to Black.
Step 6 : Press ALT+BACKSPACE to fill with the Foreground Color which is Black. Press CTRL+D to deselect. The marching ant selections go away.
Step 7 : Go to Filter>Distort>Twirl.
Step 8 : Set the Angle in the Twirl Filter dialogue box to 50. Click OK.
Step 9 : The selections have distorted slightly.
Step 10: Press CTR+F to reapply the Filter. This is how it looks after pressing CTRL+F twice.
Step 11 : This is how the image looks after reapplying the Filter by pressing CTRL+F another 10 times.
Step 12 : Click the Elliptical Marquee Tool.
Step 13 : Hold SHIFT and drag out a perfect circle in the middle.
Step 14 : Press DELETE. Press CTRL+D to deselect.
Step 15 : Press CTRL+F twice to reapply the Twirl Filter another two times.
Step 16 : Press CTRL+T. A selection forms. Drag the middle handles out as shown.
Press ENTER.
Step 17 : Click the Add Layer Style button.
Step 18 : Click Bevel and Emboss from the pop up.
Step 19 : In the Bevel and Emboss set the Size to 20 and Direction to Down. Leave the other settings alone. Click OK.
The image looks like this.
Step 20 : Download this Texture. You will find it here
It belongs to JillianStock
Ofcourse any texture will do. You will find a lot of free textures on http://www.deviantart.com/
Step 21 : Drag and drop the texture on the image with the
Move Tool.
Step 22 : Press CTRL+T. A selection forms. Right click inside the selection. Click on Rotate 90 CW.
Step 23 : The Texture flips.
Step 24 : Press CTRL+T. A selection forms. Press SHIFT+ALT and drag the top corner handle upwards. Press ENTER after resizing.
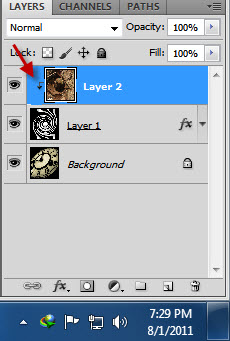
Step 25 : Hold down ALT and click between Layer2 and Layer1. A small circle black circle will appear indicating Layer2 will be clipped with Layer 1 beneath it.
The small bent arrow on Layer 2 indicates it has been clipped with Layer1.
The image looks like this.
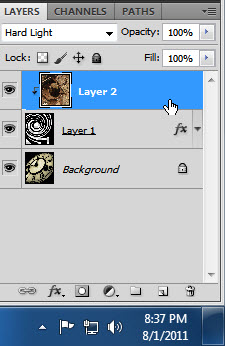
Step 26 : Change the Blend Mode to Hard Light.
The image looks like this after changing the Blend Mode.
Step 27 : Zoom out.
Step 28 : Press CTRL+T. A selection forms. drag up the top left corner upwards diagonally until the middle of the clock is visible. Press ENTER.
The image looks like this.
Step 29 : Click on the topmost layer which is Layer2.
Step 30 : Press SHIFT and click on Layer1. Both layers are highlighted.
Press CTRL+E. Both layers merge into Layer2.
Step 31 : Click the Eraser Tool.
Step 32 : The Eraser Tool works just like a Brush. Click in the top panel and select the second Brush - the Hard Round one.
Step 33 : Click the Brush icon at the right to open the Brush controls.
Step 34 : Click the Brush tip shape and drag the Spacing slider till the brush separates as shown.
Step 35 : Click the double headed arrow to make the panel go away.
Step 36 : Click once with the Erazer on the left.
Step 37 : Press SHIFT and click at the right with the Erazer. It automatically punches holes in a row.
Step 38 : Again click once with the Erazer on the left.
Step 39 : Press SHIFT and click on the right side. Again the Erazer punches holes in the layer. Continue doing this till you reach the bottom.
The finished effect. You can experiment with other brushes too.
Other photoshop tutorials are here
;
;
Labels:
Twirl Filter
Subscribe to:
Post Comments (Atom)


No comments:
Post a Comment