Wednesday, November 4, 2015
Camera Shake Reduction In Photoshop CC
Pradip Chowdhury
The Shake Reduction under Sharpen in Photoshop is a new and excellent tool that usually removes the 'shake'. It does not work if the photo is out of focus. I have used the word usually, because the sharpening is a bit too intense at times. These can be corrected with other tools in photoshop. What could not be done so far was to remove camera shake, which resulted in photos having to be thrown away. Not any more with Shake Reduction.
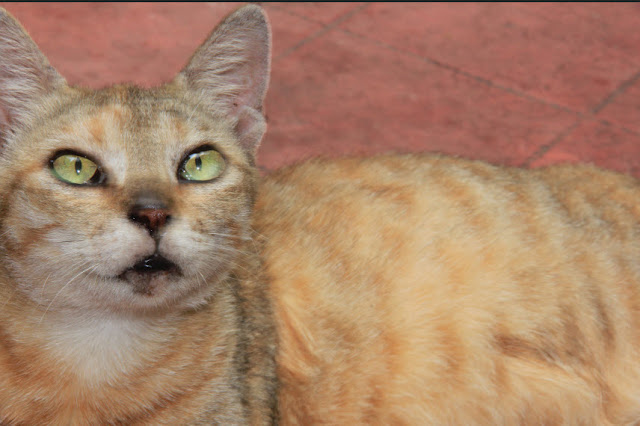

I took a photo of this cat today, but my hands must have shaken. If you look at the cat's face you can make out the camera shake.
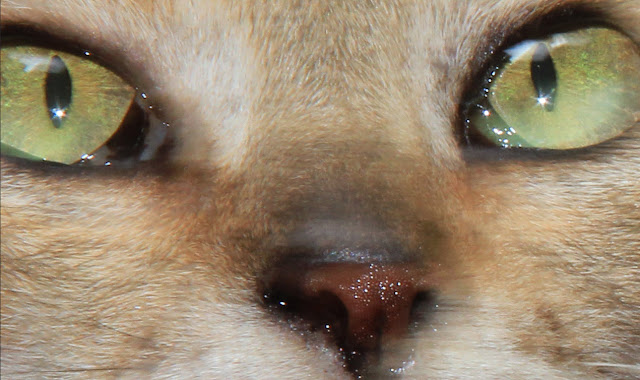
This is the photo at full zoom. The artefacts can be seen clearly.

This is the photo at full zoom. The artefacts can be seen clearly.

Photoshop Creative Cloud does not look different from the earlier PS CS6. Now to get on with Shake Reduction.

Step 1 : Shake Reduction is under Filter>Sharpen>Shake Reduction.

Step 2 : Right Click the Background layer and convert into a Smart Object.

The Background Layer has been turned into a Smart Object.

Step 3 : Click on Shake Reduction.

Step 4 : The Shake Reduction disalogue box opens.

The controls are on the right. The Source Noise is set to Auto. It usually works well in Auto.

The Source Noise can also be set to Low, Medium or High.

Step 5 : Source Noise is set to Low. But no other changes are made in the controls. The Blur Trace control is set to 31, Artifact Suppression and Smoothing are both set to 30% by default.

You can see the artefacts on the nose, eyes and lips. It has reduced.
 Step 6 : I have lowered the Blue Trace Bounds to 10 px. Artifact Suppression and Smoothing to 50%. Setting will vary from image to image. If artifacts are visible after applying Auto, try the other options. Then first lower the Blur Trace Bounds, increase the Artifact Suppression and lastly Smoothing. You can click on the image to see what the portion of the image you wish to see at full zoom.
Click OK when you are done.
 Step 7 : The Shake Reduction has been applied as Smart Filter. Double click where the hand points to.
 Step 8 : The Blending Options (Shake Reduction dialogue box opens. The Mode is set to Normal and Opacity to 100 by default.
 Step 9 : I have changed the Mode to Soft Light and lowered the Opacity to 50%. Click OK.
 The corrected image.

Click OK when you are done.


Other Photoshop tutorials are here
Subscribe to:
Post Comments (Atom)
No comments:
Post a Comment