Step 1 : Duplicate the Background Layer by pressing CTRL+J. A new Layer 1 forms.
Step 2 : Press CTRL+SHIFT+U to desaturate Layer 1.
The image is desaturated.
Step 3 : Change the Blend Mode to Color.
Step 4 : Press 3 on the keyboard to reduce the Opacity to 30%.
The image looks like this.
Step 5 : Click the New Fill or Adjustment Layer button at the bottom of the Layers palette and click on Curves.
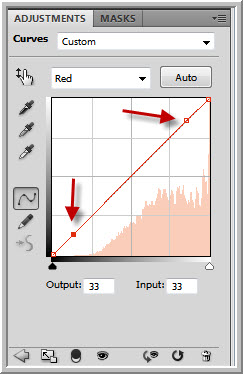
Step 6 : In the Curves window scroll down to the Red channel.
Step 7 : Place two dots on the diagonal at the top and bottom as shown.
Step 8 : Nudge the bottom point up and the top point down slightly so that the diagonal forms an S.
Step 9 : Do exactly the same thing in thing in the Green channel.
Step 10 : In the Blue channel do the opposite. Pull the bottom point down and the top point up.
Step 11 : Return to the RGB channel and place the cursor in the middle of the diagonal.
Step 12 : Drag the diagonal up as shown.
Step 13 : Lower the Opacity of the Curves Adjustment Layer by pressing 5 on the keyboard.
The image looks like this.
Step 14 : Press CTRL+SHIFT+ALT+E to form a composite Layer 2.
Step 16 : Press CTRL+J to duplicate Layer 2 to Layer2 copy. Then press CTRL+SHIFT+U to desaturate the layer.
Step 17 : Press CTRL+J to duplicate Layer 2 copy to Layer 2 copy 2. Press CTRL+I to invert.
The image looks like this.
Step 18 : Change the Blend Mode to Color Dodge.
The image turns completely white.
Step 19 : Go to Filter>Blur>Box Blur.
Step 20 : I have set a radius of 400 pixels.
The image looks like this.
Step 21 : Click on Layer 2.
Step 22 : Press CTRL+J to duplicate Layer 2 to Layer 2 copy 3.
Step 23 : Drag the layer to the top.
Step 24 : Change the Blend Mode to Hard Light.
The image looks like this.
Step 25 : Press 7 on the keyboard to lower the Opacity to 70%.
This is how the final image looks.
Other photoshop tutorials are
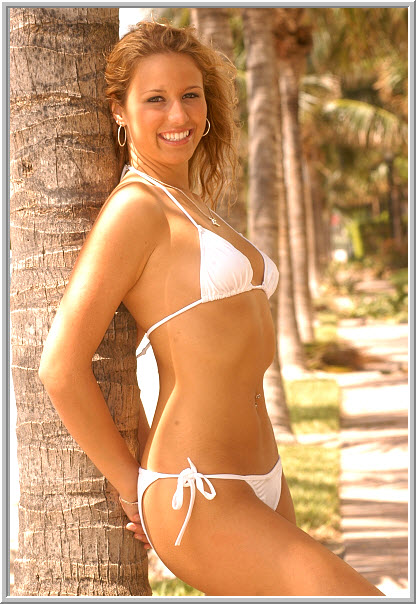
here This is the effect I will create.